Exterior Footer Drains
Exterior Footer Drains are the Cadillac of Foundation Waterproofing...and they come with a Cadillac pricetag. But for those who want the best possible protection, there is no better option. Why wait for the water to get into the foundation when you can stop it on the outside of the foundation?! The physics of it is undeniable. There are 5 main steps to a good Exterior Footer Drain Solution.
STEP ONE: The Excavation. This is the single largest driver of the cost of these systems. Since we have to dig deep, we also have to dig wide for safety and room to work. A typical Exterior Footer Drain can lead to the excavation of almost 45 TONS of soil PER WALL! That is almost 2 full TRI-AXLE dumptrucks for each wall. That is a lot of digging, and takes time to do it right, and safely.
STEP TWO: Wall Preparation. If you've ever dug up something that was stuck in the dirt for awhile you probably noticed it wasn't in very good condition anymore. Well...the outside of your foundation has been stuck in the dirt for as long as your house has stood. I'm sure you can use your imagination to envision what kind of condition the outside of your foundation wall is in once we uncover it. This means we have to undergo significant wall preparation for the next step. This could mean cleaning, power washing, grinding, or even installing new cement parging over the old existing wall. This is a time consuming process.
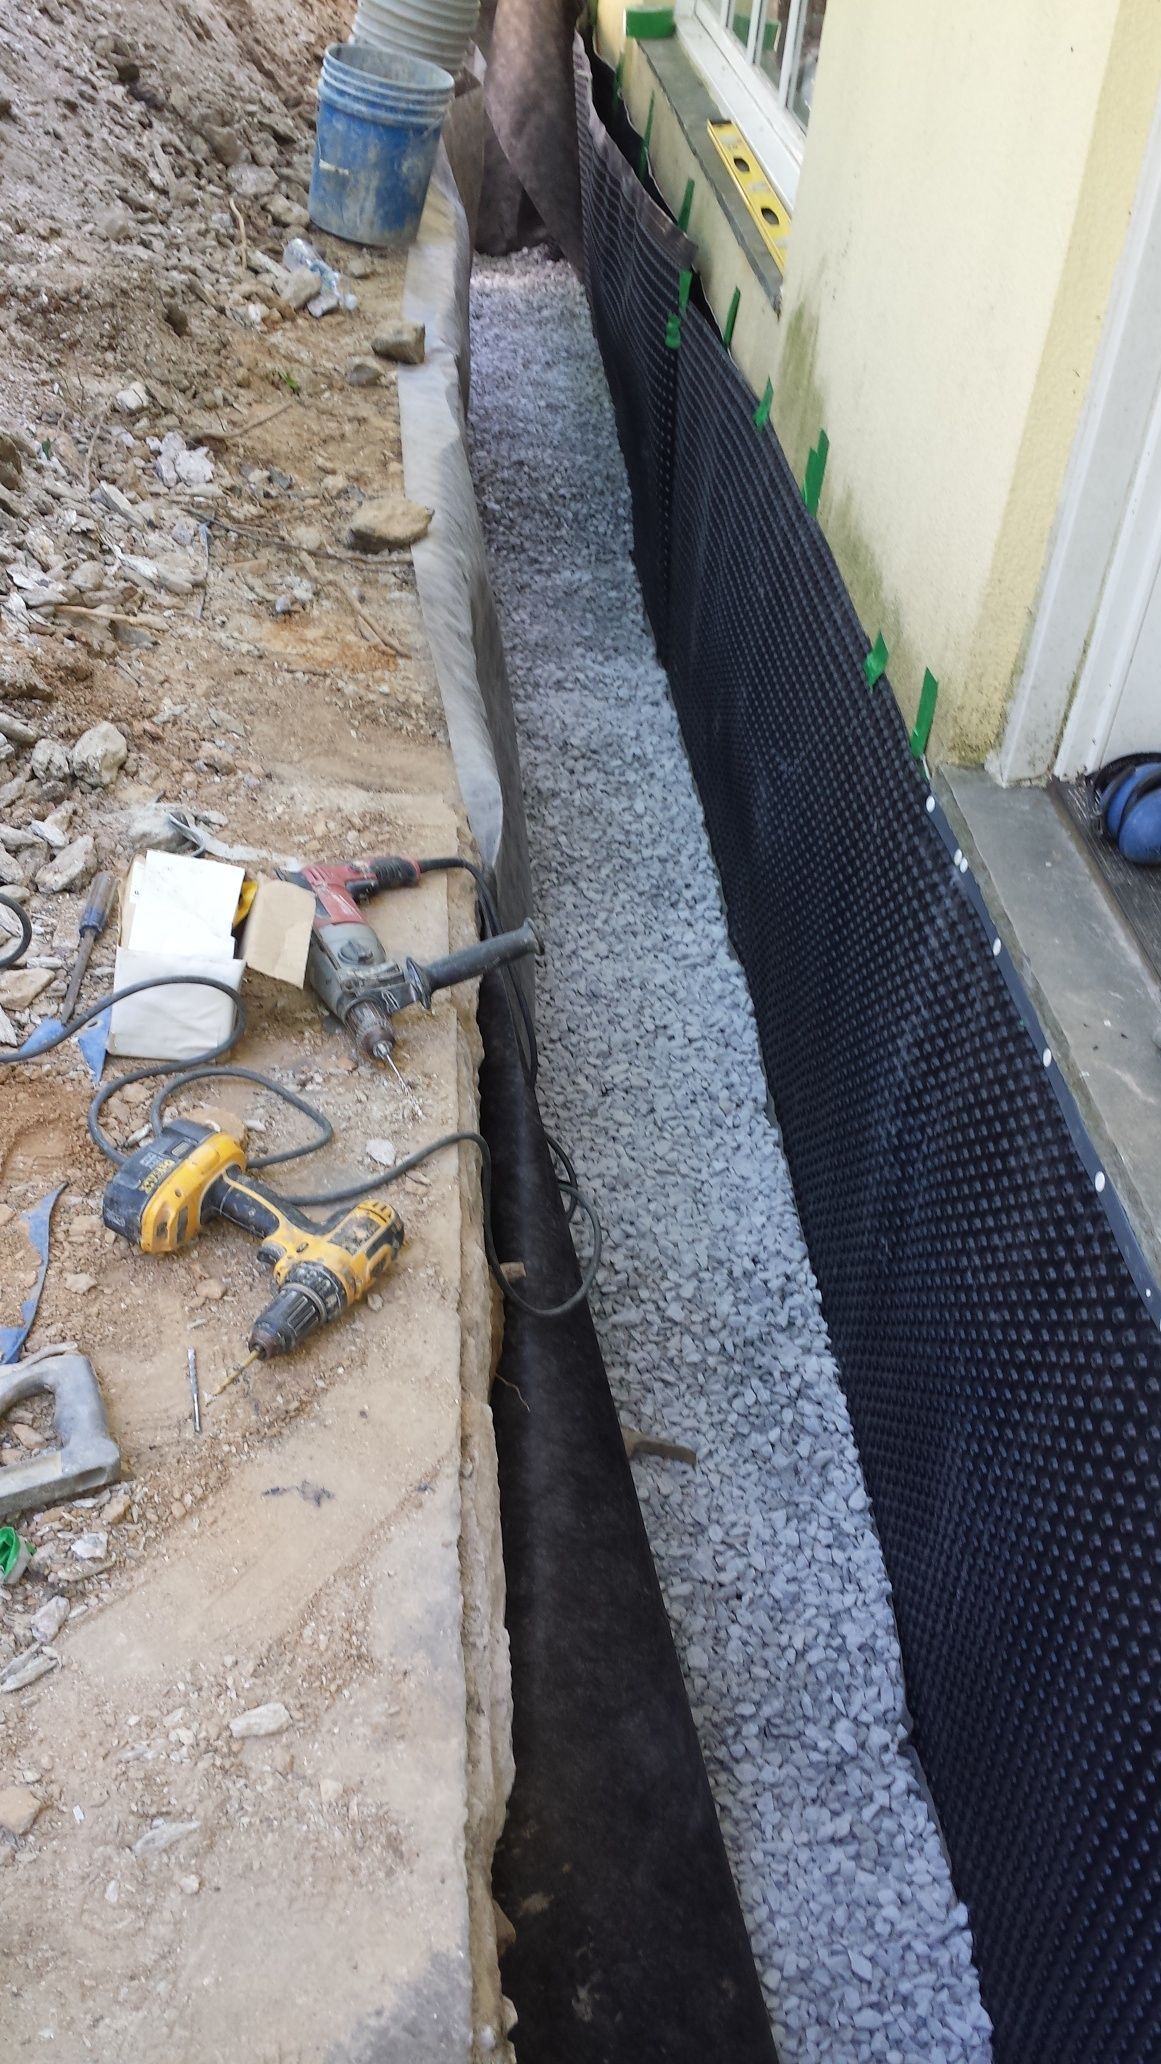
STEP THREE: Foundation Membrane. After the wall has been prepped and we have a clean, smooth surface to work with, we install a Foundation Membrane and protection course. There are several different types of membranes we choose from, depending on the foundation type, and the condition of the wall. But every membrane we use is 2 ply with a High Density Poly Ethylene (HDPE) sheeting on the outside, then a waterproofing material on the inside. That material could be either Bituminous Asphalt, or Bentonite Clay. Then after we have installed the membrane on the wall using either mastic, adhesives, mechanical fasteners, or a combination of them, we install a termination bar at the top to make sure nothing gets behind our membrane from the top. Finally we install a protection course to prevent rocks, sticks, or any other object in the soil from tearing the membrane after backfill. Our typical protection course material is either insulation boards, or Platon Board.
Step Four: Footer Drain. They key to all of this is the Footer Drain. Our Footer Drains are typically 2-3' wide and 2-3' deep. That means we use the entire base of the excavation for our footer drain, and bring the drain approximately 1/3 of the way up the foundation wall. The drain is wrapped in geotextile fabric, filled with either 4" or 6" perforated pipe, and filled with 3/4" clean crushed stone. This allows for optimal water movement, and minimizes chances of the drain clogging - which maximizes the service life of the drain.
Step Five: Discharge. Footer drains are useless unless there is a way for the water to exit the drain. Believe it or not, most footer drains have no exit point. To us, that seems ridiculous. The ideal exit point is a gravity drain that utilizes physics to work 24/7. But that is only a possibility if your house sits on a hill big enough that the bottom of the hill is lower than the bottom of your basement. Some houses qualify for this, but most do not. So for all the other houses that can't utilize a gravity drain, we install an exterior sump pump. Now...you might wonder how we can do that when it would have to be all the way down at the footer level to work. It is tricky, but it is doable. First we get pumps with longer than normal power cords. Next we use 16" diameter corrugated piping (the type they use in highway drainage construction), and set it on it's end. That pipe becomes the basin for our pump. We cut it to grade level, then put a lid on top of it. The pump gets dropped in using a combination of rope and the discharge pipe that is already connected. Since the pump is so deep, it is well below the frost line and does not freeze in winter.